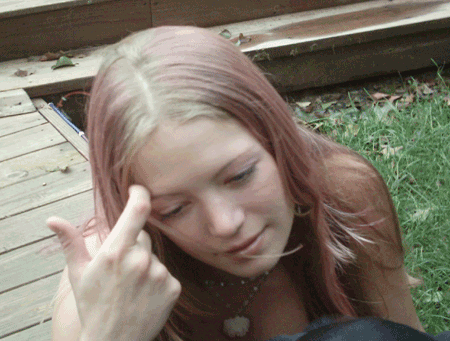
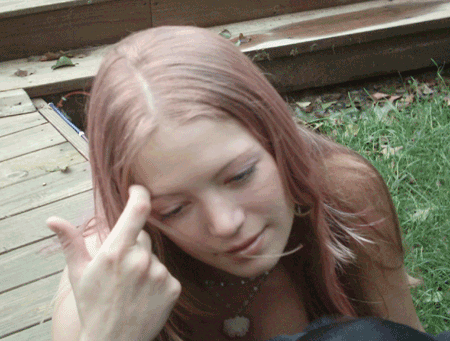
|
|
|
|
Featured Photoshop Tutorials:
|
Deprecated: mysql_connect(): The mysql extension is deprecated and will be removed in the future: use mysqli or PDO instead in /home/appelsin/public_html/kromefx/db_conn.php on line 8
|
|
Deprecated: mysql_connect(): The mysql extension is deprecated and will be removed in the future: use mysqli or PDO instead in /home/appelsin/public_html/kromefx/db_conn.php on line 8
 | | Title: | | Removing Hair Roots | | Author: | Klaatu | view all by Klaatu | | Category: | Photo Retouch | | Level: | Beginner | | Description: | Here is a fairly straight-forward method for removing hair roots that takes mere seconds to accomplish. | | Views: | 257,370 | | Date: | 2/1/2005 | | |
| Page 1 |
| Open up your picture and Select the Clone Stamp Tool (just like your instincts told you to use) | |
| Set it's Blend Mode (in the Control Bar) to Color, pick a nice soft brush set to about 50% opacity, then set your
tool reference point (opt/alt+click... you can change this on the fly as you need) and start painting. | |
| The advantages to this are that it's quick, simple and fast. The Clone Stamp Tool set to Color only affects the color
information while leaving the hair structure alone. Pretty cool, huh?
| |
| Tip: To minimize color drifting you can turn-off "Aligned" in the Control Bar so that each click you paint,
the targeted reference point stays in the same general area. This is a technique that has some limitations
(to be sure) and we would recommend that it be used judiciously. However, it works very well on small
areas and particularly well for contrasting hair roots. Think of it as a
"touch-up" technique of refinement. Why use a "2 by 4" when a toothpick will do? View the original tutorial thread at photoshoptechniques.com. |
| Page 1 |
Click Here to see the MOST POPULAR tutorials!
|
|
|


