|
|
|
|
Featured Photoshop Tutorials:
|
Deprecated: mysql_connect(): The mysql extension is deprecated and will be removed in the future: use mysqli or PDO instead in /home/appelsin/public_html/kromefx/db_conn.php on line 8
|
|
Deprecated: mysql_connect(): The mysql extension is deprecated and will be removed in the future: use mysqli or PDO instead in /home/appelsin/public_html/kromefx/db_conn.php on line 8
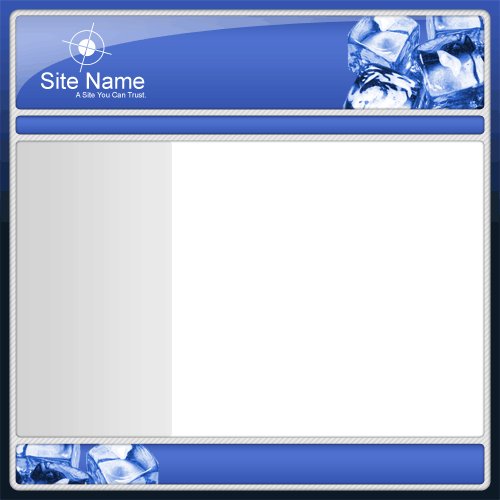
 | | Title: | | Complete Web Page Plus Code | | Author: | kromefx | view all by kromefx | | Category: | Web Layouts | | Level: | Intermediate | | Description: | This tutorial takes you from the initial setup and design of a web site, all the way through producing W3C validated CSS and XHTML 1.0 for layout, while leaving room for integrating your own designs and color schemes. The .PSD is also available for download as well as the code. | | Views: | 325,925 | | Date: | 12/9/2005 | | |
| Page 1 | Page 2 | Page 3 | Page 4 | Page 5 | Page 6 | Page 7 |
| Make sure everything is exactly the way you want it, because in this step we�re going to have to merge layers together and they will no longer be editable in the same fashion. I advise you to save a copy of your file now for this reason, that way you can edit it later. We are not going to use the slice tool because we are going to use custom code to help optimize the site and the slice tool doesn�t account for things such as expanding text areas and background images. If you�ve kept each set of objects in their own layer group (or layer set), this step will be MUCH easier. Start off by hiding all of the text and content layers, if you have put any in. | |
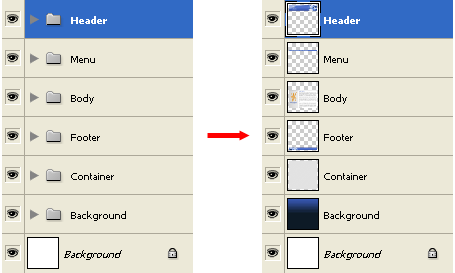
| Right now you should have the following layer groups (or layer sets in Photoshop 7): Background, Container, Header, Menu, Body, Footer. On each layer group, click the group to select it and then press CTRL-E. This will flatten that layer group so that the entire group becomes one layer. | |
| Now hide all layers except the background layer then select the background layer (this is the layer you put the background color or gradient on, NOT the background layer created when you made the new document!). Use the single column marquee tool to select one column of vertical pixels. Copy and Paste into a new image. The dimensions should be 1 X 800. Use the zoom tool to zoom in and find the very bottom pixel. Use the eyedropper tool to get the color value of this pixel. This will be used as your background color in the CSS code, so write it down or store it in a document somewhere. Now to keep things the same, you should create a new folder somewhere on your computer. Call this folder web_page. Inside the web_page folder, create another folder called images (all lowercase). Save the background file into the images folder, and name it bg.gif. use File > Save For Web to keep your files to a minimum size. Be sure that the .gif option is selected so that your images will work with the HTML/CSS given at the end of this tutorial. |
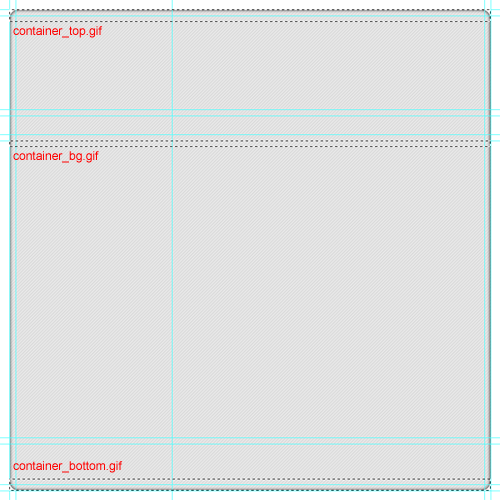
| Now hide the background layer. Unhide the container layer and select it. We will have to make 3 separate selections to create the container layer in our code. You must also know the height of your pattern, if you used a pattern. The pattern I used repeats every 10 pixels, so I will have to make sure each selection is an even multiple of 10. Since I used a 15 pixel radius on the original curve, I will have to select 20 pixels to get the top and bottom portions of the container. Then I will make a 10 pixel high selection in the middle to define the background to be used as a pattern. I�m using the fixed size option of the marquee tool to ensure that I�m selecting the appropriate amount of pixels. View the image below to see where I copied and pasted 3 different selections into new images. After each image name I am putting the size of the image. Your images must be the same size to work with the xhtml and css code provided. Save each of these images into the images folder, and name the top one container_top.gif 770X20, the middle one container_bg.gif 770X10, and the bottom one container_bottom.gif 770X20. Use the guides to ensure that you are selecting the appropriate area, and when you save make sure transparency is check marked. You may also wish to add a matte color that is close to your background color. You must also make sure that when you create the new document for each of these, that your background is set to transparent and not white or another color. All files from now on will have to be saved with transparency. | |
| Now hide all layers except the header and select the header layer. CTRL-Click on the header layer to create a selection out of it. Copy and paste it into a new image and save this image in the images folder and name it header.gif 750X150. You may want to change the matte color to a color that will match your container color. | |
| Page 1 | Page 2 | Page 3 | Page 4 | Page 5 | Page 6 | Page 7 |
| Paul 87.212.50.103 | 3/14/2008 @ 6:56pm | Awesome Tut, keep up the good work!
|
Click Here to see the MOST POPULAR tutorials!
|
|
|


